
Sauces & Condiments
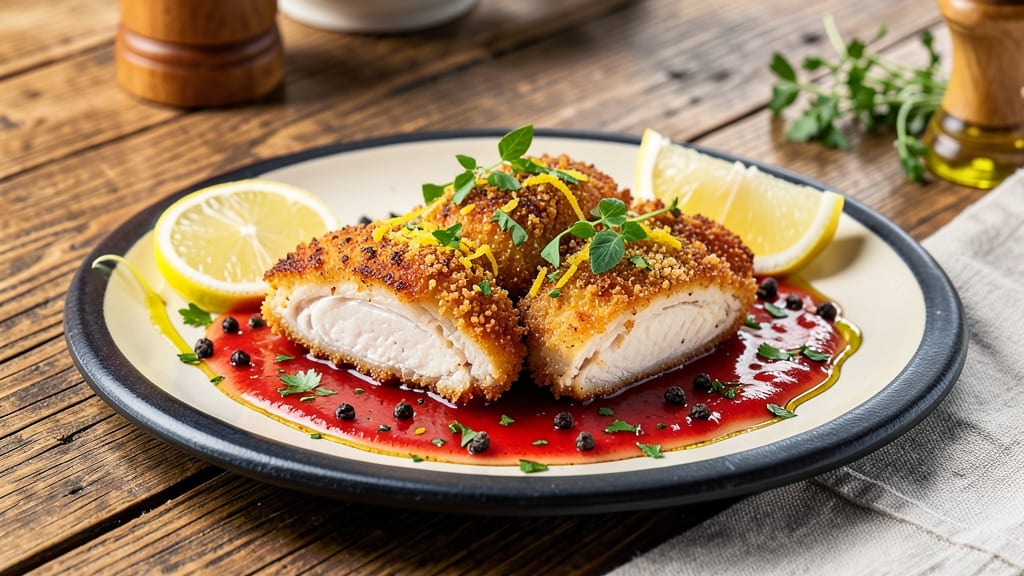
This crispy lemon chicken cutlets recipe delivers golden, shatteringly crisp edges and juicy centers that pair perfectly with bright, herby salmoriglio sauce. The secret lies in a double-breading technique—flour, egg wash, and panko—that creates that coveted restaurant-quality crunch while keeping the interior tender.
I developed this method after years of testing, and it never fails to impress even skeptical eaters.
The salmoriglio sauce transforms this dish from good to extraordinary—a tangy, garlicky lemon sauce that cuts through the richness of the chicken with its vibrant acidity.
Made with just five ingredients (anchovies, garlic, lemon, olive oil, and parsley), it's quick to prepare but packed with Mediterranean flavor that elevates every bite. The key is letting the sauce sit for 10 minutes before serving, allowing the flavors to meld completely.
By the time you plate these cutlets, you'll have perfectly golden, crispy chicken that holds its shape beautifully, topped with that glossy, zesty salmoriglio sauce. The contrast of textures—crispy chicken against the smooth, bright sauce—makes this dish both visually stunning and irresistibly delicious.
Serve with a simple arugula salad or roasted vegetables to complete the meal.
This recipe serves four and comes together in under 45 minutes, making it ideal for weeknight dinners or special occasions. The technique is straightforward but requires attention to timing—especially when frying the cutlets—to ensure that perfect balance of crispy exterior and tender interior.
Trust me, once you try this combination, it'll become your new go-to chicken dish.
Ingredients for crispy lemon chicken cutlets with salmoriglio sauce
Fourteen ingredients for restaurant-quality crispy chicken and zesty sauce that rivals any Mediterranean bistro.
| Ingredient | Amount | Notes |
|---|---|---|
| Boneless, Skinless Chicken Breast Cutlets 🍗 | 1 ½ lb | Pounded to even 1/4-inch thickness |
| All-Purpose Flour 🌾 | 1 cup | For light dusting and first breading |
| Large Eggs 🥚 | 2 whole | Separated for egg wash |
| Japanese Panko Breadcrumbs 🍞 | 1 ½ cups | Light and crispy texture |
| Extra-Virgin Olive Oil 🫒 | ½ cup | For frying chicken |
| Lemon Zest 🍋 | 1 tbsp | Freshly grated from 1 lemon |
| Fresh Lemon Juice 🍋 | ¼ cup | From 2-3 lemons |
| Anchovy Fillets 🐟 | 2 whole | High-quality, salt-packed |
| Garlic Cloves 🧄 | 4 cloves | Fresh, peeled and minced |
| Fresh Flat-Leaf Parsley 🌿 | ¼ cup | Finely chopped, stems removed |
| Diamond Crystal Kosher Salt 🧂 | 1 tsp | For seasoning |
| Ground Black Pepper 🌶️ | ½ tsp | Freshly ground |
| Vegetable Oil 🫒 | 1 ½ cups | For frying (high smoke point) |
The chicken cutlets require precise thickness—pound them to exactly 1/4-inch using a meat mallet or rolling pin. Look for boneless, skinless breasts with minimal fat at Whole Foods or your butcher's counter, as lean cuts brown more evenly. Freshness matters here: use the chicken within 2 days of purchase. For the panko, Japanese brands like Shiga create the lightest, crispiest crust—avoid the dense, compacted varieties. The anchovies should be high-quality, salt-packed (like Colosio or Filippini) for optimal flavor without overpowering the sauce.
No panko? Toasted breadcrumbs with 1 tsp cornstarch work in a pinch, though texture won't be identical. Substitute anchovies with 1 tbsp capers plus 1 tsp fish sauce for a vegetarian version, though flavor will differ slightly. The lemon zest and juice must be fresh—bottled versions lack the aromatic oils that create that signature brightness. For the parsley, flat-leaf is essential—curly parsley lacks the intensity. If you can't find extra-virgin olive oil, light olive oil works for frying, but reserve the EVOO for finishing the sauce. The vegetable oil should have a smoke point of 400°F+—avoid extra-virgin olive oil for frying.
Store raw chicken on the bottom shelf of your fridge, using within 2 days for optimal texture. The prepared cutlets hold for 1 day refrigerated before frying, but fresh is always better. The salmoriglio sauce keeps for 3 days refrigerated in an airtight container, though flavor peaks within the first 24 hours. For meal prep, fry the cutlets ahead and reheat in a 375°F oven for 10 minutes—they crisp up beautifully. Freeze the sauce in ice cube trays for easy portioning, then transfer to a bag where it'll last 3 months.
Why You'll Love This Recipe
- No-Fuss Coating: I swear by the flour-egg-panko combo—just three quick dredges, no fancy techniques. The panko gives that shatteringly crisp crust without needing a deep fryer, and honestly? My kids help with the breading while I chop lemons. (Yes, even on a Tuesday night.)
- Zesty Crunch Magic: That salmoriglio sauce—garlic, lemon zest, capers—cuts through the richness of the chicken like a bright summer breeze. The panko’s crunch meets the tangy, herby sauce in every bite, and I’ll be real: I’ve made it three times this month just to taste that combo again.
- Weeknight to Dinner Party: Same recipe, different vibes. Toss it together for a lazy Thursday dinner, or dress it up with arugula salad and crusty bread for guests. The cutlets reheat beautifully, so I often make a double batch—half for now, half for when life gets busy.
- Budget Crispy Perfection: Chicken breasts are affordable, and panko stretches further than regular breadcrumbs. A single lemon yields enough zest for two batches, and the sauce’s pantry staples (olive oil, vinegar, herbs) mean no wasted ingredients. My wallet and my taste buds win.
Step-by-step instructions for crispy lemon chicken cutlets with salmoriglio sauce
Master the perfect balance of crunchy panko and tender chicken with this precise technique.
Prepare the Chicken Cutlets for Even Cooking
Lay the 1.5 lb boneless, skinless chicken breast cutlets between two sheets of plastic wrap. Using a meat mallet, pound them to an even ¼-inch thickness throughout. This ensures consistent cooking and prevents any portion from drying out. You'll know you've done it properly when the cutlets look uniformly flat and the thickness is consistent across all pieces.
Season both sides generously with the 1 tsp diamond crystal kosher salt and 0.5 tsp ground black pepper. This initial seasoning penetrates the meat while it rests. Place the seasoned cutlets on a plate and refrigerate for 15 minutes. This brief rest allows the salt to begin working its magic, enhancing flavor and helping the breading adhere better during coating.
Create the Breading Station for Perfect Crispiness
Set up three shallow dishes for your breading station. In the first dish, place the 1 cup all-purpose flour. In the second dish, beat the 2 whole large eggs until just combined. In the third and final dish, place the 1.5 cups Japanese panko breadcrumbs. The panko's light, airy texture is crucial for achieving that signature crispy exterior we're after.
Working with one cutlet at a time, lightly dust it with the flour, shaking off any excess. Dip the floured cutlet into the beaten egg, allowing any excess to drip off, then press it firmly into the panko breadcrumbs, coating all sides completely. The double-dipping technique ensures maximum adhesion of the breading. Place the breaded cutlets on a wire rack set over a baking sheet to allow air circulation on all sides, which is essential for even crisping.
Fry the Chicken to Golden Perfection
Heat the 1.5 cups vegetable oil in a large skillet over medium heat until it reaches 350°F on a thermometer. The oil should be hot enough to sizzle gently when you add the breaded cutlets, but not smoking excessively. Working in batches to avoid overcrowding, carefully slide the breaded cutlets into the hot oil. Cook for 3-4 minutes per side until they achieve a deep golden brown color and the internal temperature reaches 165°F.
Use tongs to flip the cutlets only once, pressing down gently during the first minute of cooking to ensure even contact with the oil. This prevents curling and guarantees that every surface develops that coveted crispy crust. Remove the cooked cutlets to a paper towel-lined plate to drain excess oil. Keep them warm in a 200°F oven while you prepare the salmoriglio sauce.
Prepare the Salmoriglio Sauce with Bright Citrus Notes
In a small bowl, combine the 0.25 cup fresh lemon juice, 1 tbsp lemon zest, 2 whole anchovy fillets (finely chopped), 4 cloves minced garlic, and 0.25 cup finely chopped fresh flat-leaf parsley. Let this mixture sit for 5 minutes to allow the flavors to meld together. The anchovies will dissolve completely, creating a rich umami base that perfectly complements the bright citrus notes.
In a separate small saucepan, gently heat the 0.5 cup extra-virgin olive oil over low heat. Add the lemon-anchovy mixture and simmer for 2-3 minutes until the sauce thickens slightly but remains silky smooth. Taste and adjust seasoning with additional salt if needed. This sauce should be vibrant and tangy, cutting through the richness of the fried chicken while enhancing its natural flavors.
Assemble and Serve Immediately
Return the fried chicken cutlets to the skillet and spoon the warm salmoriglio sauce over the top, basting them gently. The residual heat will help the sauce cling to the crispy exterior. Serve the cutlets immediately while they're still piping hot, with any remaining sauce drizzled over the top. Each bite should deliver that perfect contrast of crispy panko crust, tender chicken, and bright, herby lemon sauce.
For optimal presentation, arrange the cutlets on a warm platter and garnish with additional lemon zest and chopped parsley. Serve with a simple arugula salad or roasted vegetables to complement the dish without overpowering its star qualities. The key to success lies in the timing—everything must come together hot and fresh for that restaurant-quality experience at home.
Pro Tips For Making Crispy Lemon Chicken Cutlets With Salmoriglio Sauce
- Pound Chicken Thin: I learned this the hard way—thick cutlets stay moist inside but turn rubbery. Aim for ¼-inch thickness after pounding, and press firmly with a rolling pin or heavy pan. Skip the meat mallet if you don’t have one; a glass bottle wrapped in plastic works in a pinch.
- Use Cold Eggs: Warm eggs create a gummy coating that sticks to the pan. Crack them straight from the fridge into a bowl, then whisk vigorously—this whips in air for a lighter crust. I used to rush this, and the cutlets always felt heavy afterward.
- Double-Coat for Crunch: Flour first, dip in egg, then press the panko onto both sides—don’t just sprinkle. The extra effort locks in that golden, shatterable crust. Pro tip: Toast the panko in a dry pan for 2 minutes before coating; it adds depth and prevents sogginess.
- Fry in Batches: Crowding the pan steams the cutlets instead of searing them. Use a 12-inch skillet and fry just 2-3 pieces at a time over medium-high heat. If your oil isn’t sizzling within 30 seconds, it’s too cool—add more or let it heat longer.
Make-ahead tips for crispy lemon chicken cutlets with salmoriglio sauce
Prep Cutlets Ahead
Save time by prepping the chicken cutlets the night before. Pound them to ¼-inch thickness and season with salt and pepper, then refrigerate uncovered for 12-24 hours. This allows the salt to deeply penetrate the meat, resulting in more flavorful and juicy cutlets.
Store them in an airtight container lined with parchment paper to prevent sticking. When ready to cook, simply set up your breading station and fry as directed. 💪
Sauce Prep Shortcut
Make the salmoriglio sauce up to 3 days in advance and store it in an airtight container in the refrigerator. The flavors actually improve as they meld together over time.
When ready to serve, simply reheat the sauce gently in a small saucepan over low heat for 1-2 minutes to restore its silky texture. This is perfect for meal prep—just fry the cutlets fresh and assemble with the pre-made sauce. ✨
Freezer-Friendly Method
For ultimate convenience, bread the cutlets completely and freeze them on a parchment-lined tray for 1 hour to set. Transfer to a freezer bag and store for up to 1 month.
When ready to cook, thaw in the refrigerator overnight, then fry from frozen in 350°F oil for 5-6 minutes per side. The breading will stay crispy even after freezing, and the chicken will remain juicy.
Just be sure to use a meat thermometer to confirm it reaches 165°F internally. ❄️
Batch Fry Technique
Double the recipe and fry all the cutlets at once for large gatherings. Keep them warm in a 200°F oven on a wire rack while you prepare the sauce. This method works beautifully for parties—just fry everything first, then assemble plates with the warm sauce.
The cutlets will stay crispy for up to 30 minutes this way, giving you time to plate everything perfectly. 🍽️
Sauce Portioning Hack
Divide the salmoriglio sauce into 1-tablespoon portions and freeze in ice cube trays. Once frozen, transfer the cubes to a freezer bag where they'll keep for 3 months.
When ready to serve, simply thaw one cube at room temperature for 5 minutes, then warm it gently in a small saucepan with 1 teaspoon olive oil. This makes it easy to add the perfect amount of sauce to each plate without overpowering the dish. 💡
Nutrition facts
Frequently asked questions
Can I bake these lemon chicken cutlets instead of frying?
For an oven-baked version, preheat to 425°F and brush the breaded cutlets with 1 tbsp olive oil before baking on a wire rack for 12-15 minutes until golden and reaching 165°F internally. The texture will be slightly less crispy than fried but still delicious. Baking reduces oil but requires careful monitoring to avoid drying.
What if my panko breading falls off when frying?
This usually happens if the chicken wasn't dry enough or the breading wasn't pressed firmly. Pat the cutlets completely dry with paper towels before seasoning, and press the panko extra hard using the back of a spoon. For extra adhesion, chill the breaded cutlets for 10 minutes before frying to help the coating set.
Can I make the salmoriglio sauce without anchovies?
Yes! Replace the anchovies with 1 tbsp capers plus 1 tsp fish sauce for a vegetarian version, or use 1 tsp soy sauce for a simpler alternative. The sauce will be less umami-rich but still bright and lemony. For extra depth, add ½ tsp smoked paprika to compensate for the missing anchovy saltiness.
How do I keep the cutlets crispy when reheating?
Reheat in a 400°F oven for 5-7 minutes on a wire rack (not a plate) to maintain crispiness. Avoid microwaving—it makes the breading soggy. For extra crunch, broil for 1-2 minutes at the end, watching closely to prevent burning. Serve immediately after reheating for best results.
What's the best way to serve these cutlets?
Pair with a simple arugula salad with lemon vinaigrette or roasted seasonal vegetables to balance the richness. For a complete meal, serve with crusty bread to soak up the sauce and a crisp white wine like Sauvignon Blanc. The bright acidity complements both the chicken and sauce perfectly.