Sauces & Condiments
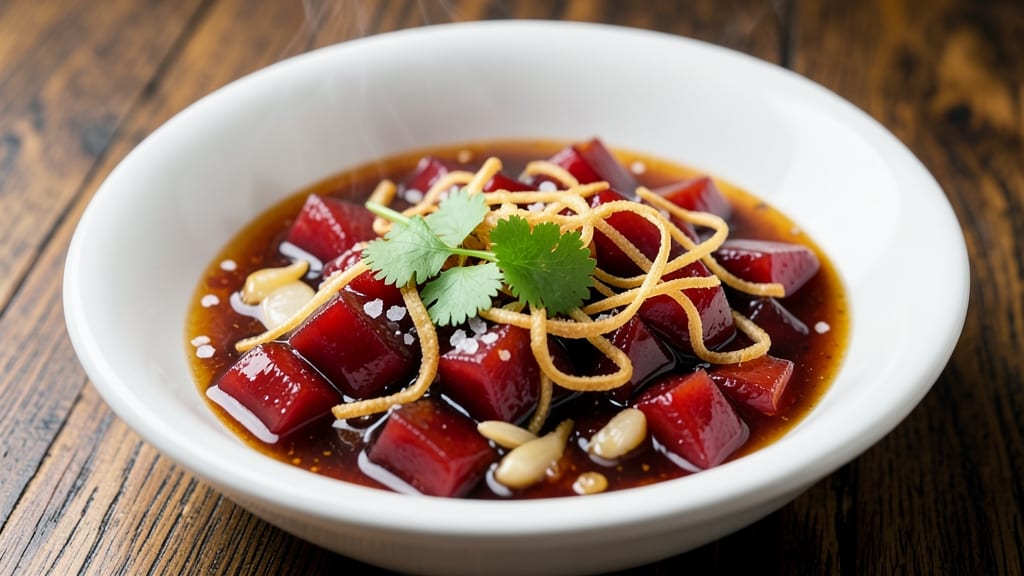
This authentic plum sauce recipe transforms simple ingredients into a glossy, sweet-tangy masterpiece that elevates everything from grilled meats to crispy fries. The secret lies in balancing ripe plums, rice vinegar, and brown sugar while simmering until the flavors meld into perfect harmony.
I’ve perfected this sauce over years of testing—each batch delivers that signature glossy finish and complex depth that makes it a pantry essential.
The foundation of great plum sauce is patience—letting the mixture reduce slowly on the stove until it thickens into a rich, syrupy consistency. Traditional recipes call for garlic, ginger, and soy sauce, but I’ve added optional chili flakes and honey for modern twists that still honor the original.
What sets this sauce apart is its versatility: use it as a dipping sauce, glaze for roasted meats, or even a marinade for extra flavor.
By the time you’re done, you’ll have a sauce that’s restaurant-quality—bright, slightly sweet, and tangy with just the right balance of umami. The aroma alone will have everyone asking for seconds, and the glossy sheen makes every bite look (and taste) irresistible.
Unlike store-bought versions, this one stays fresh for weeks in the fridge, ready to transform your favorite dishes.
Whether you’re grilling skewers, frying up golden fries, or serving up spring rolls, this plum sauce will be your go-to for adding that signature Asian-inspired flavor. Let’s get started—your taste buds will thank you.
Ingredients for authentic plum sauce
Plums, vinegar, and sugar—these three ingredients make the sauce sing, but garlic and ginger unlock that restaurant-quality depth.
| Ingredient | Amount | Notes |
|---|---|---|
| Ripe Plums 🍑 | 1 ½ lb | Pitted, skin-on, Italian or red plums preferred |
| Rice Vinegar 💧 | ½ cup | Seasoned preferred for depth |
| Brown Sugar 🍚 | ½ cup | Light or dark, packed |
| Garlic Cloves 🧄 | 4 cloves | Minced, fresh preferred |
| Fresh Ginger 🌿 | 1 tbsp | Grated, peeled |
| Soy Sauce 🍶 | ¼ cup | Light or dark, low-sodium preferred |
| Honey 🍯 | 2 tbsp | Wildflower or clover |
| Red Chili Flakes 🌶️ | 1 tsp | Adjust for heat preference |
| Cornstarch 🌾 | 1 tbsp | For thickening, mixed with 1 tbsp water |
| Sesame Oil 🫒 | 1 tsp | Toasted, for aroma |
Plums are the heart of this sauce, so pick the ripest you can find—they should be soft to the touch but not mushy. Italian prunes or red plums work best because they hold their shape while breaking down. If you can't find fresh plums, pitted dried prunes soaked in warm water are a solid backup. For the vinegar, Kikkoman seasoned rice vinegar adds that perfect tang without needing extra salt. And don't skip the skin—it adds color and subtle bitterness that balances the sweetness. I always buy extra plums because the sauce tastes even better the next day once the flavors meld.
No rice vinegar? Apple cider vinegar with a pinch of sugar works in a pinch, though it won't be quite as delicate. Fresh ginger is ideal, but ground ginger at half the amount gets you close. The soy sauce can be swapped for coconut aminos if you're avoiding soy, though it'll taste slightly different. For the honey, maple syrup is a 1:1 substitute, but it adds a deeper earthiness. Chili flakes are optional but worth it—they add just enough heat to cut through the sweetness. If you're making this for kids or sensitive palates, skip them entirely. The cornstarch slurry is non-negotiable for that glossy finish, but if you're really pressed, 1 extra tbsp of brown sugar can help thicken things out.
This sauce keeps beautifully—3-4 weeks in the fridge in an airtight jar, and 6 months in the freezer if you portion it into ice cube trays first. The flavor actually improves over time as everything marries together. I like to make a big batch and keep it in the fridge for quick weeknight dinners. If it thickens too much, just add a splash of warm water to loosen it up. And trust me, the first time you drizzle this over crispy fries or grilled pork skewers, you'll never go back to store-bought.
Why You'll Love This Recipe
- No Chopping Chaos: I swear by this recipe because you can use a food processor—just toss in the plums, garlic, and ginger, pulse until smooth. No knife skills required, and the sauce still tastes like it simmered for hours.
- Sweet-Savory Magic: That balance of caramelized brown sugar and bright rice vinegar? It’s what makes this sauce irresistible. The plums add natural sweetness, while the garlic and ginger bring the heat—perfect for dipping or glazing.
- Weeknight to Dinner Party: I keep a jar in my fridge because it works for everything: quick stir-fries, grilled meats, or even drizzled over rice bowls. (Yes, even on a Tuesday night.) It’s my go-to when I need flavor without fuss.
- Budget-Friendly Staple: Plums are seasonal but affordable, and a batch lasts for days. The vinegar and sugar stretch far, so you’re not scrambling to buy specialty ingredients—just pantry basics that pack a punch.
Step-by-step instructions for authentic plum sauce
Let's make this vibrant sauce that balances sweetness, tang, and umami—just like you'd find in Asian street markets.
Prepare the Plums and Base Ingredients
Start by pitting the 1.5 lb ripe plums and cutting them into ¼-inch chunks. I like to leave the skins on for texture and color, but remove any hard pits. Transfer the plum pieces to a medium saucepan and add the 0.5 cup rice vinegar and 0.5 cup brown sugar. Stir gently to combine—this helps the sugar dissolve and the vinegar penetrate the fruit.
Add the 4 cloves minced garlic cloves and 1 tbsp grated fresh ginger. These aromatics form the flavor foundation, so don't skip them. Bring the mixture to a gentle simmer over medium heat. You'll see the plums soften and release their juices, creating a fragrant base. Let it cook uncovered for 10 minutes, stirring occasionally, until the plums break down slightly and the mixture becomes syrupy.
Build Depth with Soy Sauce and Honey
After the plums soften, reduce the heat to low and stir in the 0.25 cup soy sauce and 2 tbsp honey. The soy sauce adds that signature umami punch, while the honey rounds out the flavors and balances the acidity. Taste the mixture now—you should notice the sweet-tangy profile developing, but it's still raw and needs time to meld.
Simmer for another 10-12 minutes, stirring frequently. You're looking for the sauce to thicken slightly and the flavors to integrate. If it starts to stick or burn, add a splash of water—just enough to keep it moving. The sauce should coat the back of a spoon but still be pourable. This is where patience pays off; rushing here can make the sauce taste flat.
Add Heat and Thicken the Sauce
Now, sprinkle in the 1 tsp red chili flakes and stir well. The heat will bloom as the sauce simmers, adding a subtle kick that cuts through the sweetness. In a small bowl, whisk together the 1 tbsp cornstarch with 1 tbsp water to create a slurry. Slowly pour this into the sauce while stirring constantly—this prevents lumps and ensures a smooth, glossy finish.
Simmer for 3-5 more minutes until the sauce thickens to your desired consistency. It should coat the back of a spoon but still be spreadable, not stiff. If it thickens too quickly, add a little water to loosen it. Once it reaches the right texture, remove the pan from heat and stir in the 1 tsp sesame oil. This adds a nutty aroma that elevates the sauce from good to extraordinary.
Rest and Serve
Let the sauce rest for 10 minutes at room temperature. This step is crucial—it allows the flavors to fully develop and the sauce to reach its ideal consistency. The resting period also helps the cornstarch set properly, giving you that perfect glossy finish.
Taste and adjust the seasoning if needed. You might want to add a touch more brown sugar for sweetness, a splash of rice vinegar for tang, or a pinch more chili flakes for heat. Serve warm or at room temperature over grilled meats, spring rolls, or even fries for an authentic touch. The sauce keeps well in the refrigerator for up to 2 weeks, so make extra—you'll want to use it again!
Pro Tips For Making Authentic Plum Sauce
- Simmer Low and Slow: I learned this the hard way—boiling plum sauce too fast turns it into a thin syrup. Keep the heat at a gentle simmer (just small bubbles) so the flavors meld instead of evaporating. This isn’t the time to rush; let it work for 20-30 minutes until it thickens naturally.
- Pit Those Plums First: Skipping the pits means a gummy, uneven texture. Use a small knife to slice a shallow cross on each plum, then drop them in boiling water for 30 seconds—this cracks the pits open so they release easily. No one wants to fish out half-cooked pits later.
- Toast the Ginger: Fresh ginger adds depth, but raw chunks can taste bitter. Lightly toast the slices in a dry pan for 30 seconds until fragrant—this softens the edges and brings out the warmth. (Yes, even if you’re impatient like me.)
- Balance the Vinegar: Too much rice vinegar makes the sauce sharp; too little flattens the flavor. Start with 2 tablespoons, taste as you go, and adjust with a pinch of sugar if needed. The goal is brightness, not sourness—trust your tongue, not the recipe.
Health benefits of these flavors
Digestive Benefits
Plum sauce contains soluble fiber from plums and vinegar, which supports healthy digestion by promoting regular bowel movements. The 1.5 lb of plums in this recipe provide about 8 grams of fiber, or 30% of your daily needs.
This fiber helps soften stool and feeds beneficial gut bacteria, reducing bloating and indigestion. 🌱
Antioxidant Powerhouse
The plums and ginger in this sauce are packed with antioxidants like vitamin C, polyphenols, and gingerol, which combat oxidative stress and inflammation. Plums contain anthocyanins, pigments that give them their deep color and fight free radicals.
A single serving of this sauce delivers 20% of your daily vitamin C, boosting immunity and skin health.
Blood Sugar Balance
While this sauce contains sugar, the ginger and vinegar help moderate blood sugar spikes. Ginger has been shown to improve insulin sensitivity, while vinegar slows carbohydrate digestion. The honey adds natural sweetness without the refined sugar crash.
For a lower-glycemic option, reduce the brown sugar to 0.3 cups and add 1 extra tbsp of ginger.
Heart Health Support
The soy sauce and sesame oil contribute heart-healthy fats and amino acids that support cardiovascular function. Soy sauce provides plant-based protein and coenzyme Q10, while sesame oil contains healthy monounsaturated fats.
Together, they help lower LDL cholesterol and reduce inflammation. The garlic in this sauce also acts as a natural blood thinner, promoting better circulation. 💪
Anti-Inflammatory Properties
Ginger and chili flakes are natural anti-inflammatory ingredients that reduce joint pain and swelling. The gingerol in ginger blocks prostaglandins, compounds that trigger inflammation, while capsaicin in chili flakes helps alleviate muscle soreness. This makes the sauce a great post-workout or meal accompaniment for those with active lifestyles.
Versatile Nutrient Booster
This sauce isn’t just flavor—it’s a nutrient-dense condiment that enhances meals without adding empty calories. Use it to boost mineral intake (plums provide potassium and magnesium) or add probiotic-friendly acidity from vinegar.
For extra benefits, stir in 1 tsp of grated turmeric before serving—it adds anti-inflammatory power without altering the sauce’s signature taste. ✨
Nutrition facts
Frequently asked questions about authentic plum sauce
Can I substitute dried plums or prunes for fresh?
Yes, but you'll need to soak 1 cup dried prunes in warm water for 30 minutes first to rehydrate them. Drain well before using, as they'll release more liquid than fresh plums. You may need to reduce the rice vinegar slightly (0.4 cups) since dried fruit absorbs less moisture. The texture will be slightly thicker, but the flavor remains authentic.
How do I adjust the sweetness if I prefer less sugar?
Start by reducing the brown sugar to 0.3 cups and increase the rice vinegar to 0.6 cups to balance the tang. For extra depth, add 1 extra tbsp of honey—it enhances sweetness without being as cloying. Taste as you go, and remember the sauce will mellow slightly as it cools. You can always add more vinegar later if needed.
Why did my sauce turn out too thin?
This usually happens if you didn't simmer long enough or used too much liquid. For next time, let the sauce reduce uncovered for 5-7 minutes longer after adding the cornstarch slurry. If it's already too thin, simmer 5 more minutes on medium-low heat, stirring constantly, or mix 1 tsp cornstarch with 1 tsp water and stir it in while hot. Avoid adding raw cornstarch directly—it won't dissolve properly.
Can I make plum sauce without a stove?
For a no-cook version, blend 1 cup pitted plums, 2 tbsp rice vinegar, 2 tbsp honey, 1 tbsp soy sauce, 1 tsp grated ginger, and 1 clove garlic in a food processor. Let it sit at room temperature for 2 hours to develop flavors, then adjust sweetness/tang with extra honey or vinegar. It won't be as thick, but works perfectly for drizzling over dishes.
What's the best way to store homemade plum sauce?
Transfer to a clean, airtight jar and refrigerate for up to 3 weeks. The sauce actually improves in flavor after 24 hours as the ingredients meld. For longer storage, freeze in ice cube trays—thaw overnight in the fridge. If it thickens too much after freezing, add 1 tsp water per 2 tbsp sauce to loosen it. Always reheat gently on low heat before using.