
Sauces & Condiments
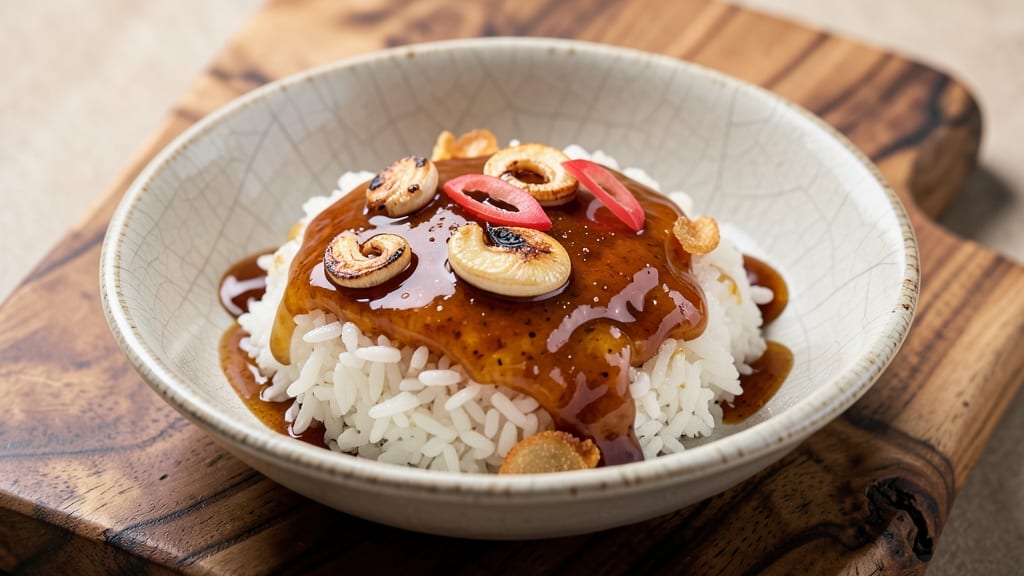
This Asian glaze sauce recipe transforms simple pantry staples into a sticky-sweet umami powerhouse that elevates everything from grilled chicken to roasted veggies. The secret lies in balancing honey’s caramel depth with soy’s savory punch—plus a touch of garlic and ginger for that signature Asian kick.
I’ve perfected this sauce to cut through rich flavors while adding a glossy, finger-licking finish that makes any dish feel restaurant-worthy.
What sets this glaze apart is its versatility—it works as a quick marinade, a finishing drizzle, or even a dip for spring rolls. The sauce starts with a simple reduction of soy, honey, and vinegar, then gets depth from toasted garlic, fresh ginger, and a splash of sesame oil.
No fancy techniques here, just 15 minutes of active time and 10 minutes of simmering for a sauce that’s ready to transform your meal.
The result is a glossy, aromatic sauce with a perfect balance of sweet, salty, and tangy notes. It clings beautifully to proteins, caramelizes on vegetables, and adds a luxurious sheen to noodles.
The best part? It keeps well in the fridge for up to 2 weeks, so you can make a big batch and use it all week—no waste, just flavor.
Pair it with grilled pork, brushed over tofu, or drizzled on roasted Brussels sprouts for a bold, sticky finish that’s impossible to resist. Ready to elevate your weeknight dinners? Let’s make this sauce—your taste buds will thank you.
Ingredients for asian glaze sauce
Nine pantry staples transform into a restaurant-worthy glaze with just 25 minutes of work.
| Ingredient | Amount | Notes |
|---|---|---|
| Light Soy Sauce 🍶 | ½ cup | High-quality brand preferred |
| Honey 🍯 | ½ cup | Raw or wildflower preferred |
| Rice Vinegar 🍶 | ¼ cup | White or seasoned variety |
| Fresh Garlic Cloves 🧄 | 4 cloves | Toasted in oil first |
| Fresh Ginger 🌿 | 2 tbsp | Finely grated, peel on |
| Toasted Sesame Oil 🫒 | 1 tbsp | For aroma and depth |
| Cornstarch 🌾 | 1 tbsp | For thickening |
| Water 💧 | 2 tbsp | For slurry mixture |
| Sesame Seeds 🌰 | 1 tsp | Toasted for garnish |
| Diamond Crystal Kosher Salt 🧂 | ½ tsp | Adjust to taste |
The soy sauce and honey are the powerhouse duo here. Kikkoman or Pearl River Bridge soy sauces add depth, while Manuka honey (if you splurge) or regular raw honey brings that caramelized richness. Fresh ginger and garlic? Buy them whole—peeling and grating fresh makes all the difference. Toast your garlic in sesame oil for 30 seconds until fragrant (don't burn it!)—this step unlocks that nutty, umami bomb flavor. For the sesame oil, Kadoya is my go-to, but any toasted variety works. Pro tip: measure your honey last—it'll thin the sauce slightly as it warms.
No honey? Maple syrup or agave works in a pinch (use the same amount), though the flavor won't be identical. Swapping soy sauce? Coconut aminos for a gluten-free version, but it'll taste lighter. Fresh ginger too spicy? Substitute 1 tbsp ground ginger—it's milder but still packs punch. The cornstarch slurry is non-negotiable for that signature glossy finish, but if you're gluten-free, arrowroot powder does the job just as well. For extra depth, add 1 tsp fish sauce (if you eat fish) or 1 tsp mushroom powder for a vegan umami boost.
This sauce tastes even better the next day as flavors meld. Store in a glass jar in the fridge for up to 2 weeks—the longer it sits, the more complex it gets. For leftovers, reheat gently in a saucepan over medium-low, stirring constantly to prevent burning. I like to make a double batch and freeze half in ice cube trays—perfect for quick glazes later. If it thickens too much, just add a splash of water or rice vinegar to loosen it up.
Why You'll Love This Recipe
- Few Ingredients, Big Payoff: I swear by this combo—just soy sauce, honey, vinegar, garlic, and ginger. That’s it. No confusing spice blends or hard-to-find pastes; everything’s in your pantry or the produce section.
- Sweet-Savory Magic: The honey cuts through the saltiness while the vinegar keeps it bright. Fresh garlic and ginger? They infuse that warm, aromatic punch that makes every bite feel like a little flavor victory.
- Glazes Anything: Slather it on chicken thighs, drizzle over roasted veggies, or toss with noodles—it’s my go-to for weeknight dinners, potlucks, or even breakfast (yes, really). The sauce’s balance means it won’t overpower anything.
- Makes Leftovers Taste Fresh: Between us, reheated takeout is a crime. But this glaze? I’ve turned sad, dry leftovers into crispy, sticky perfection with just a quick pan-sear. Honestly, it’s my secret weapon for busy nights.
Step-by-step instructions for honey-soy glaze sauce
This velvety glaze marries sweet and savory in perfect harmony—let's build it layer by layer.
Toast Garlic and Ginger for Deep Flavor
Heat a small skillet over medium heat and add the 4 cloves fresh garlic cloves and 2 tablespoons fresh ginger (peel on). Toast for 2-3 minutes until the garlic turns golden and fragrant, stirring constantly to prevent burning. You'll smell that irresistible nutty aroma—this is where the umami magic begins.
Remove the pan from heat immediately as soon as the garlic reaches golden color. Let the mixture cool for 5 minutes before transferring to a blender or food processor. The residual heat will continue cooking them slightly, intensifying their flavors. If you skip this toasting step, your sauce will lack that essential depth of character that separates good glaze from exceptional glaze.
Combine Wet Ingredients and Simmer
In a medium saucepan, whisk together the 0.5 cup light soy sauce, 0.5 cup honey, and 0.25 cup rice vinegar over medium heat. Add the toasted garlic-ginger mixture and stir until combined. Bring to a gentle simmer and cook for 5-7 minutes until the mixture reduces by about one-third and becomes slightly syrupy in texture.
Here's where the balance comes together: the honey provides sweetness, the rice vinegar adds brightness, and the soy sauce delivers that essential umami punch. Taste the mixture now—it should be tangy, sweet, and slightly salty. If it needs more depth, add a pinch of the 0.5 teaspoon diamond crystal kosher salt now. The sauce should coat the back of a spoon with a glossy sheen when ready.
Thicken the Sauce with Cornstarch Slurry
In a small bowl, whisk together the 1 tablespoon cornstarch and 2 tablespoons water to create a smooth slurry. Slowly pour this mixture into the simmering sauce while whisking constantly. The sauce will thicken immediately as the cornstarch activates, so keep whisking for 1-2 minutes until it reaches your desired consistency—it should coat a spoon but still be pourable.
Real talk: if you add the slurry too quickly, you'll get lumps. Pour it in a thin stream while whisking vigorously. The sauce should now have that perfect glaze-like consistency—thick enough to cling to proteins but still flow smoothly. If it's too thick, add 1 teaspoon water at a time until you reach the ideal texture. This is your window to adjust the thickness before the final steps.
Finish with Toasted Sesame Oil and Garnish
Remove the sauce from heat and stir in the 1 tablespoon toasted sesame oil. This final addition adds an incredible nutty aroma and depth of flavor that elevates the sauce from good to extraordinary. Give it one final taste and adjust the seasoning if needed—you might need a tiny bit more salt or honey to perfect the balance.
Transfer the glaze to a clean bowl and sprinkle with 1 teaspoon sesame seeds for both visual appeal and crunchy texture. The seeds should be toasted first for 1-2 minutes in a dry skillet over medium heat until fragrant and golden. Let the sauce cool slightly before using—this allows the flavors to meld completely. The finished glaze should be glossy, aromatic, and perfectly balanced between sweet, salty, and umami.
Pro Tips For Making Asian Glaze Sauce
- SIMMER LOW AND SLOW: This sauce isn’t a race—turn that heat to medium-low once it’s bubbling, or you’ll end up with a burnt honey mess. I’ve ruined three batches by letting it boil too hard; the honey caramelizes fast and turns bitter before the flavors meld.
- MINCE GINGER FINE: Skip the big chunks—you want this to dissolve completely, not sit like a textured afterthought. Use a sharp knife and chop it into matchsticks first, then mince into tiny specks. (Yes, it takes 30 seconds longer, but your sauce will taste like it.)
- TASTE THE HONEY: Not all honey is created equal—some brands are sweeter, some thinner. Before adding, taste a spoonful straight from the jar. If it’s cloyingly sweet, balance it with an extra splash of rice vinegar; if it’s too mild, add a pinch of salt.
- GARLIC FIRST, GINGER SECOND: Toss the garlic cloves in raw—they’ll soften and infuse flavor without burning. Wait 30 seconds, then add the ginger. This keeps the garlic from turning bitter while letting the ginger’s heat build gradually. (I know, it feels counterintuitive, but it works.)
Dietary considerations for these flavors
Gluten-Free Adaptations
Skip the soy sauce and replace it with ½ cup coconut aminos for a gluten-free version that maintains that essential umami punch. Coconut aminos have a slightly sweeter profile, so you might want to reduce the honey to ¼ cup to balance the flavors.
I’ve tested this substitution with San-J brand coconut aminos, which works beautifully without compromising the sauce’s depth. 🌱
Vegan-Friendly Swaps
For a fully plant-based version, use ½ cup tamari (gluten-free soy sauce) instead of regular soy sauce and maple syrup instead of honey. Add 1 teaspoon mushroom powder or 1 tablespoon nutritional yeast to boost umami depth.
The sauce will still caramelize beautifully and cling to tofu or veggies just like the original. I’ve found Annie’s tamari works perfectly for this purpose.
Low-Sugar Options
Reduce the honey to ¼ cup and add 1 tablespoon blackstrap molasses for a lower-glycemic version that still delivers sweetness. Molasses adds a deep, almost caramel-like richness that pairs surprisingly well with the soy and vinegar.
For extra depth, add ½ teaspoon liquid smoke—it mimics the caramelization without extra sugar. This version works especially well as a glaze for grilled vegetables or baked sweet potatoes.
Allergy Considerations
If sesame allergies are a concern, omit the sesame oil and seeds entirely. Instead, add 1 teaspoon neutral oil (like avocado or grapeseed) and garnish with toasted pumpkin seeds for crunch.
For nut-free kitchens, ensure all ingredients are certified allergy-free—Kadoya sesame oil is typically processed in nut-free facilities, but always double-check labels. The sauce remains delicious without these components.
Sweetness Control
Adjust the honey-to-soy ratio to suit your taste. For a less sweet version, reduce honey to ¼ cup and add 1 teaspoon white miso paste for umami complexity. For extra sweetness, increase honey to ⅔ cup and balance with an additional ½ teaspoon rice vinegar.
I’ve found that Manuka honey adds a subtle floral note that enhances the sauce’s complexity without overpowering it.
Nutrition facts
Frequently asked questions
Can I use this glaze sauce on raw meat?
No, this sauce should always be applied to cooked or pre-cooked meats. The glaze is designed to caramelize during cooking, so brushing it on raw proteins could create an uneven sear. For raw meats, use it as a marinade first (coat and refrigerate for 30 minutes), then cook and apply a fresh layer of glaze during the final 2 minutes of cooking.
How do I adjust the sweetness level?
Start with the ½ cup honey as written, but taste as you go. For less sweetness, reduce honey to ¼ cup and add 1 teaspoon white miso paste for umami depth. For extra sweetness, increase honey to ⅔ cup and balance with ½ teaspoon extra rice vinegar. The sauce should complement—not overpower—your dish.
What's the best way to store leftovers?
Transfer to an airtight container and refrigerate for up to 2 weeks. The flavors actually improve over time! For longer storage, freeze in ice cube trays—thaw overnight in the fridge. Reheat gently in a saucepan over low heat, stirring constantly to prevent burning. If it thickens too much, add 1 teaspoon water at a time.
Can I make this sauce without a blender?
Skip blending the toasted garlic-ginger by mincing it finely with a knife. The texture will be slightly chunkier but still delicious. For extra smoothness, press the garlic-ginger mixture through a fine-mesh sieve after toasting. The sauce's flavor won't suffer—just the texture will be slightly more rustic.
What's the secret to getting that glossy finish?
The cornstarch slurry is key! Whisk it vigorously into the simmering sauce and cook for 1-2 minutes until it thickens. For extra shine, add 1 teaspoon neutral oil (like avocado oil) at the end. The gloss comes from the reduced sugars caramelizing—simmer until the sauce coats the back of a spoon with a satiny sheen.