
Sauces & Condiments
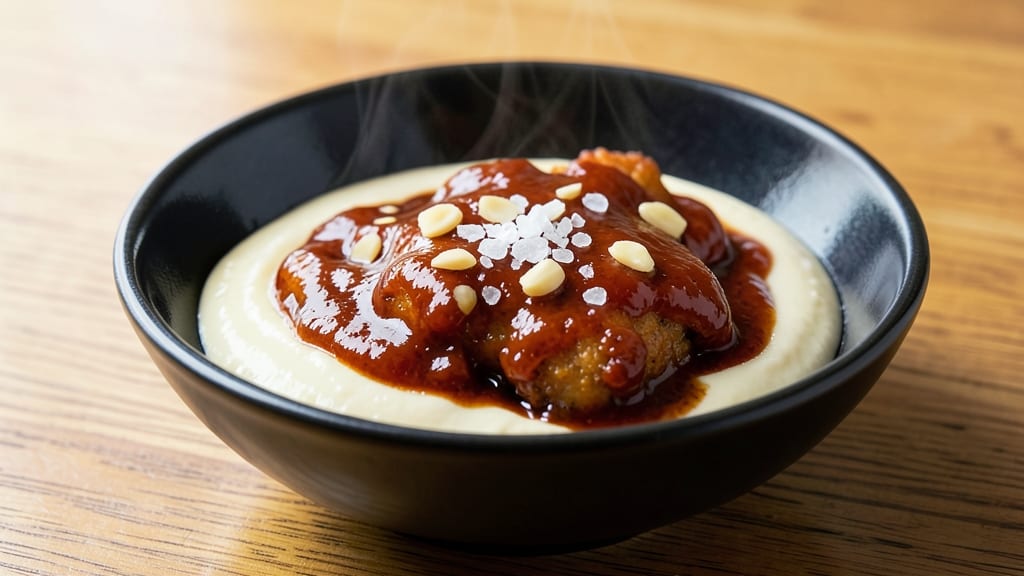
This Applebee's wing sauce recipe delivers that signature sweet-spicy honey garlic glaze that makes every bite unforgettable. The secret lies in balancing heat, sweetness, and umami—creating a sauce that's sticky, aromatic, and perfectly addictive.
I've replicated the restaurant version at home with just six simple ingredients, ensuring you get that same tangy-sweet flavor profile that pairs perfectly with crispy wings.
The sauce starts with a rich base of melted butter and minced garlic, which forms the foundation for the sweet-spicy profile. Honey adds that signature caramelized sweetness, while hot sauce brings the heat, and soy sauce deepens the umami.
The sauce is designed to be versatile—whether you're tossing it with wings, using it as a dipping sauce, or drizzling it over other proteins like chicken or pork.
What makes this sauce truly special is its ability to caramelize slightly when heated, creating a glossy, sticky glaze that clings to every bite.
The preparation is straightforward, taking just 10 minutes to make, and the sauce keeps well in the refrigerator for up to two weeks, making it perfect for meal prep. It’s the kind of sauce that elevates ordinary wings into something extraordinary.
Once you taste this homemade version, you’ll never settle for the bottled stuff again. The balance of flavors is precise—sweet without being cloying, spicy without overwhelming, and savory enough to make your taste buds sing. Let’s get started on making this restaurant-quality sauce at home!
Ingredients for applebees wing sauce
Six simple ingredients create that iconic sweet-spicy honey garlic glaze you crave.
| Ingredient | Amount | Notes |
|---|---|---|
| Unsalted Butter 🧈 | ½ cup | Melted and cooled slightly |
| Garlic Cloves 🧄 | 6 cloves | Minced finely for aroma |
| Honey 🍯 | ½ cup | Wildflower or clover preferred |
| Hot Sauce 🌶️ | 2 tbsp | Frank's RedHot recommended |
| Soy Sauce 🍶 | 2 tbsp | Light or dark preferred |
| Kosher Salt 🧂 | ½ tsp | Diamond Crystal preferred |
The butter and garlic form the flavor foundation—don't skip the mincing. Fresh garlic makes all the difference, but if you're short on time, jarred minced works. For honey, local wildflower adds depth, but store-bought clover is fine. Hot sauce is where the magic happens—Frank's RedHot is the gold standard, but any brand with a good kick works. Grab the soy sauce from the Asian aisle; light or dark both work, but light gives a cleaner taste. The salt balances everything, so don't skip it—trust me on this.
No honey? Maple syrup or agave in the same amount gets you close. Short on hot sauce? Sriracha at half the quantity works, but it'll be less tangy. The butter can be swapped for vegetable oil or coconut oil if you're avoiding dairy, though butter gives the best richness. If your garlic burns while cooking, reduce the heat—it should sizzle gently, not smoke. And if you're making extra, freeze half for next time—it keeps perfectly for up to 3 months.
This sauce caramelizes beautifully when reheated, so it tastes even better the next day. Store it in a glass jar in the fridge for up to 2 weeks. If it thickens too much, just stir in a splash of water. I like to keep a small jar on hand at all times—it disappears fast when wings are on the menu. The sauce also freezes well, so make a big batch and thank me later.
Why You'll Love This Recipe
- Five-Ingredient Magic: I swear, this sauce comes together with stuff you already have—no fancy shopping required. Melt butter, toss in minced garlic, then just stir in honey, hot sauce, and a splash of soy. That’s it. No measuring cups, no stress.
- Sweet Heat Balance: The honey and hot sauce team up for a flavor that’s actually addictive—not too sweet, not too spicy, but just right. Honestly, I’ve tried store-bought sauces that taste like they missed the mark, but this? It’s the perfect crispy-wing hug.
- Game for Any Occasion: Slather it on wings, drizzle it over fries, or toss it with roasted veggies—this sauce doesn’t care what you throw at it. Between us, I’ve even used it as a quick marinade for chicken thighs. No judgment if you eat it straight from the spoon.
- Leftovers That Last: Make a double batch and store it in the fridge for up to two weeks. The flavors only get better as it sits, and it’s way cheaper than buying sauce by the bottle. My freezer’s got a jar of this stuff labeled “emergency flavor fix”—because sometimes, you just need it.
Step-by-step instructions for sweet-spicy honey garlic glaze
This sauce is where the magic happens—simple ingredients, perfect balance, and that signature Applebee's tang.
🍳 Step 1: Melt the Butter and Bloom the Garlic
Place the 0.5 cup unsalted butter in a medium saucepan over medium-low heat. Let it melt completely, stirring occasionally, until it's fully liquid but not browned. This should take about 3-4 minutes—you're looking for smooth, melted butter that's just warm to the touch, not hot.
Once melted, reduce the heat to low and add the 6 minced garlic cloves. Let them sit in the butter for 1 minute without stirring. You'll see them soften slightly and release their aroma. This step, called "blooming," draws out the garlic's natural oils and prevents them from burning. After that minute, stir gently for 30 seconds until the garlic is fragrant but not browned.
🍳 Step 2: Combine Wet Ingredients and Simmer
Add the 0.5 cup honey, 2 tablespoons hot sauce, 2 tablespoons soy sauce, and 0.5 teaspoon kosher salt to the saucepan. Stir well to combine all ingredients, scraping the bottom of the pan to release any browned bits that might have formed. This is where the sauce starts to come together—you'll notice the honey begins to dissolve into the butter.
Increase the heat to medium and bring the mixture to a gentle simmer. Let it cook for 8-10 minutes, stirring occasionally, until it thickens slightly. You're looking for a sauce that coats the back of a spoon but still flows smoothly. If it starts to bubble vigorously, reduce the heat to medium-low to prevent it from burning. The sauce should smell rich, sweet, and slightly spicy—this is your cue that everything is working.
⏰ Step 3: Thicken and Test for Perfection
After the initial 8-10 minutes of simmering, reduce the heat to low and continue cooking for another 3-5 minutes. This final phase allows the sauce to thicken further and for the flavors to meld completely. Stir frequently to ensure even cooking and prevent any sticking. You'll know it's ready when the sauce reaches a glossy, syrupy consistency—it should coat a spoon but still be pourable.
To test, take a small spoonful and let it cool slightly. The sauce should be balanced—sweet from the honey, with a kick from the hot sauce and umami depth from the soy sauce. If it tastes too sweet, add a tiny bit more hot sauce or soy sauce. If it needs more salt, add a pinch at a time until it's perfectly balanced. The sauce should be vibrant and ready to transform your wings into something extraordinary.
🍽️ Step 4: Cool and Use Immediately
Once the sauce reaches the perfect consistency, remove it from the heat and let it cool for 5 minutes. This step is crucial—it allows the flavors to settle and the sauce to thicken slightly as it cools. Stir once or twice during this time to redistribute any settled ingredients.
The sauce is now ready to use. You can serve it warm over wings, drizzle it over grilled meats, or even use it as a glaze for vegetables. For best results, use it immediately, as the sauce continues to thicken as it cools. If you need to store it, transfer it to an airtight container and refrigerate for up to 1 week. Reheat gently in a saucepan over low heat, stirring frequently, until warmed through. Avoid microwaving, as it can alter the texture.
Pro Tips For Making Applebees Wing Sauce
- Melt Butter Slowly: I learned this the hard way—dumping cold butter into a hot pan makes it splatter like a science experiment. Instead, cut the butter into small cubes and let it melt gently over medium-low heat. You want it to foam and turn golden, not smoke like you’re deep-frying bacon. This keeps the sauce smooth and prevents that burnt-butter bitterness that ruins everything.
- Minced Garlic, Not Chopped: Whole garlic cloves in this sauce? Nope. You need minced—tiny, even pieces that dissolve completely. If you’re lazy and just chop, you’ll end up with chewy garlic bits that turn the sauce into a textural nightmare. Use a knife or a garlic press, but for real consistency, a microplane works best. Trust me, your sauce will taste like it came from a restaurant, not a rushed weeknight.
- Balance the Heat: Hot sauce is the wild card here—some brands are nuclear, others taste like tomato juice. Start with half the amount listed in the recipe, taste, then add more if needed. I once used a ghost pepper hot sauce by accident and had to dump half the batch. Soy sauce’s saltiness will mellow it out, but if your sauce tastes like a fire alarm, you’ve gone too far. Better to adjust now than regret it later.
- Simmer, Don’t Boil: This sauce isn’t a stir-fry—it’s a slow simmer. Once everything’s combined, reduce the heat to medium-low and let it bubble gently for 3-4 minutes. Boiling it turns the butter grainy and the honey too sharp. Think of it like making a pan sauce for steak: patience here makes all the difference. If it looks too thick, add a splash of water; if too thin, simmer longer. No shortcuts.
Storing and reheating this dish
Refrigerator Storage
Transfer your freshly made wing sauce to a clean glass jar or airtight container while it's still warm—this helps prevent condensation from forming later. Let it cool completely before sealing, then store it in the fridge for up to 2 weeks.
The sauce will thicken slightly as it chills, so give it a quick stir before using. I like to keep a small jar on hand at all times because it disappears fast when wings are on the menu. 🥫
Freezer Preservation
For long-term storage, portion the sauce into ice cube trays or small freezer-safe containers. Freeze for up to 3 months—this works perfectly for meal prep. When ready to use, thaw overnight in the fridge or microwave in 10-second bursts until just melted.
Stir well before reheating, as the sauce may separate slightly during freezing. I find this method ideal for batch cooking when I know I'll need extra sauce later. ❄️
Reheating Perfection
Always reheat your wing sauce gently over low heat in a small saucepan. Add 1-2 tablespoons of water if it thickens too much during storage. Stir constantly for 3-5 minutes until warmed through—this restores its glossy, sticky texture.
Microwaving is a no-go; it can make the sauce unevenly heated and lose its smooth consistency. The slow method brings back that restaurant-quality sheen. 🔥
Thinning Thick Sauce
If your sauce becomes too thick after refrigeration, simply stir in 1 teaspoon of water at a time until it reaches your desired consistency. For extra richness, you can also thin it with 1 teaspoon of chicken broth—this adds subtle depth without diluting the flavor.
I've found this trick especially helpful when using the sauce as a glaze for meats or vegetables. The key is patience; let it sit for a minute after adding liquid to see how it behaves. 💡
Long-Term Flavor Boost
The sauce actually improves with age, developing deeper caramelized notes over time. If you notice the honey flavor becoming more pronounced after a week in the fridge, that's a good sign—it means the flavors are melding beautifully.
For extra depth, add ½ teaspoon of garlic powder when reheating. This little trick reminds me of how restaurant sauces often taste even better the next day. 🌟
Nutrition facts
Frequently asked questions
Can I make this sauce without butter?
Yes! For a dairy-free version, substitute the 0.5 cup butter with 0.5 cup vegetable oil or coconut oil. The sauce will still develop that signature glossy texture, though butter adds the best richness. If using coconut oil, choose refined for a neutral flavor.
How can I adjust the spice level?
Start with the 2 tablespoons hot sauce as written, then taste and adjust. For milder heat, reduce to 1 tablespoon or swap for 1 teaspoon hot sauce + 1 teaspoon ketchup. For extra spice, add ½ teaspoon cayenne pepper or increase hot sauce to 3 tablespoons. Always taste before serving!
What's the best way to use leftover sauce?
This versatile sauce works beyond wings! Use it as a marinade for chicken or pork, drizzle over grilled vegetables, or toss with noodles. For extra creativity, mix 1 tablespoon sauce + 1 tablespoon mayo to make a quick dipping sauce for fries or spring rolls. The possibilities are endless!
Why did my sauce separate in the fridge?
This happens when fats (from butter) and liquids separate during cooling. Simply stir vigorously before using, or gently reheat over low heat while stirring constantly. For prevention, let the sauce cool slightly before refrigerating. The texture will restore perfectly when warmed!
Can I make this sauce in a slow cooker?
Combine all ingredients in your slow cooker on low heat for 1-2 hours, stirring occasionally. The slow cooking enhances the caramelization naturally. If it thickens too much, add 1-2 tablespoons water before serving. Perfect for meal prep!