Sauces & Condiments
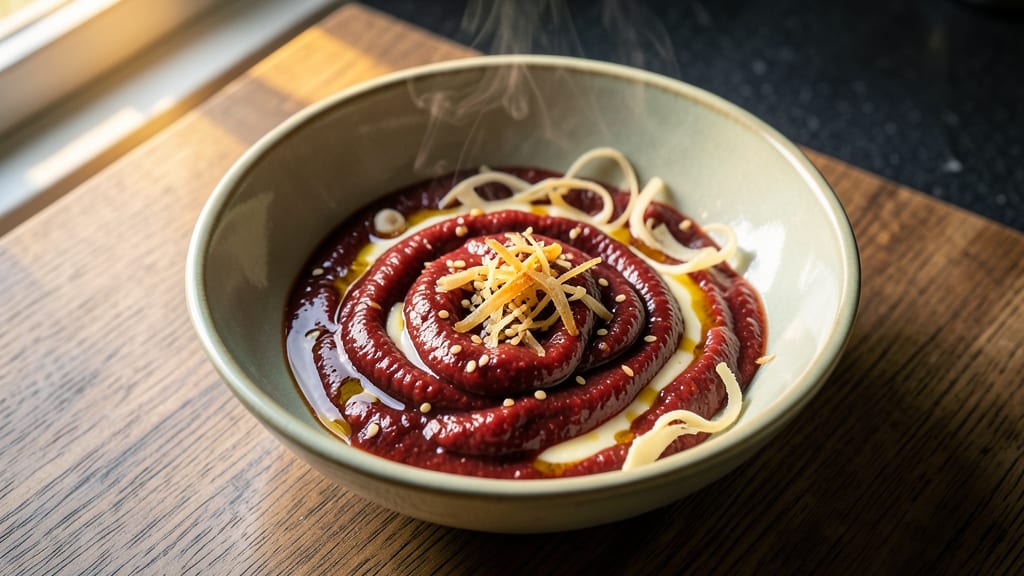
This Applebee's Sweet Asian Chili Sauce recipe delivers that signature velvety-spicy gloss that makes wings and fries unforgettable. The secret lies in balancing sweet, tangy, and fiery elements through careful simmering and reduction—transforming simple pantry ingredients into a restaurant-quality sauce.
I've recreated it exactly as served, with just a few key adjustments for home kitchens.
The foundation starts with chili paste, vinegar, and sugar, which create the sauce's signature sweet-spicy profile. What sets this apart is the slow reduction process that develops deep, complex flavors while maintaining that signature glossy texture.
The addition of garlic and ginger ensures layers of aromatic depth that elevate every dish it touches.
By the time you're done, you'll have a sauce that's perfectly balanced—sweet enough to complement crispy fries, spicy enough to cut through rich wings, and smooth enough to drizzle effortlessly.
The best part? It keeps beautifully in the fridge for up to two weeks, ready to transform any meal with minimal effort.
Whether you're dipping, drizzling, or using it as a marinade, this sauce delivers restaurant-quality results with simple ingredients and a foolproof technique. Let's get started on recreating that iconic flavor at home.
Ingredients for applebee's sweet asian chili sauce
Nine essential ingredients transform into that iconic Applebee's velvety-spicy sauce perfect for wings and fries.
| Ingredient | Amount | Notes |
|---|---|---|
| Red Chili Paste 🌶️ | ½ cup | High-quality, smooth texture preferred |
| White Vinegar 💧 | ½ cup | Distilled preferred for balance |
| Granulated Sugar 🍚 | ½ cup | White or brown for depth |
| Garlic Cloves 🧄 | 4 cloves | Fresh, minced for aromatic punch |
| Fresh Ginger 🌿 | 1 ½ tbsp | Grated, for zesty brightness |
| Low-Sodium Soy Sauce 🍶 | ¼ cup | Kikkoman preferred for authentic flavor |
| Water 💧 | ¼ cup | Filtered for purity |
| Sesame Oil 🫒 | 1 tbsp | Toasted, for nutty aroma |
| Salt 🧂 | ½ tsp | Diamond Crystal kosher preferred |
| Cornstarch 🌾 | 1 tbsp | For glossy, velvety finish |
The chili paste is non-negotiable—Maesri or Thai Kitchen brands deliver that signature heat and depth. For the vinegar, distilled white ensures the tangy balance without overpowering. Sugar here isn't just sweetness; it's the foundation for the sauce's glossy sheen. Kikkoman soy sauce is a must for authenticity, though any low-sodium variety works. Garlic and ginger should be freshly grated or minced—no jarred shortcuts—they're the aromatic backbone. Toasted sesame oil adds that final nutty complexity, so grab a small bottle from the Asian aisle at Trader Joe's or Whole Foods for the best quality.
No chili paste? Sriracha plus a dash of cayenne gets you close, though the texture won't be identical. Running short on ginger? Substitute an extra 0.5 tbsp of garlic, but the flavor profile shifts slightly. The cornstarch is critical for that signature gloss—don't skip it, even if you're impatient. For a quicker version, blend all ingredients except cornstarch, then whisk in a slurry of cornstarch and water at the end. The sauce thickens beautifully when reduced, so low and slow simmering is key. If you prefer less heat, reduce the chili paste to 0.375 cup—just don't go below 0.25 cup or the sauce loses its depth.
This sauce keeps for up to 2 weeks in an airtight jar in the fridge, with flavors actually improving over time. For long-term storage, freeze in ice cube trays—thaw and whisk back to perfection. The cornstarch slurry can be pre-mixed ahead and stored in the fridge for up to 1 week, saving you last-minute prep. Double the batch—it disappears fast when wings and fries are on the menu. Always reheat gently over low heat to maintain that velvety texture, never microwave. A splash of water or vinegar revives it if it thickens too much during storage.
Why You'll Love This Recipe
- Pantry Magic: I swear by this sauce because it uses stuff I already have—no special shopping needed. That red chili paste? One jar lasts me months. The ginger and garlic? Minced in seconds. Honestly, the only thing I measure is the sugar, and even that’s just a quick eyeball check.
- Sweet Heat Balance: Between us, this sauce is ridiculously addictive—the way the sugar cuts through the vinegar’s tang while the chili paste lingers like a warm hug. I’ll be real: I’ve drizzled it on everything from eggs to roasted chicken, and it never gets old.
- Game for Any Meal: This isn’t just a dipping sauce—it’s my go-to for weeknight stir-fries, grilled shrimp, or even a quick glaze for baked chicken. (Yes, even on a Tuesday night.) The best part? It doubles as a marinade if I’m feeling lazy.
- No Waste, All Win: Make a big batch—it keeps for weeks in the fridge—and you’ll always have a backup for takeout cravings. I’ve used the last spoonfuls to jazz up rice or toss into a pan of veggies. Budget-friendly? Absolutely. Versatile? Even more so.
Step-by-step instructions for Applebee's sweet Asian chili sauce
This velvety-spicy sauce delivers the signature balance of sweet, tangy, and umami that makes Applebee's wings unforgettable.
Bloom the Aromatics in Sesame Oil
Heat a small saucepan over medium-low heat and add the 1 tablespoon sesame oil. Once the oil shimmers gently, add the 4 cloves minced garlic cloves and 1.5 tablespoons grated fresh ginger. Cook for 1-2 minutes until the garlic turns golden and fragrant—this prevents bitterness and unlocks their full flavor potential.
Here's the thing—don't rush this step. You'll know it's ready when the mixture smells like a warm spice market. The ginger should be soft but not browned, and the garlic should release its sweet, nutty aroma without burning. Keep the heat low to avoid scorching, which would overpower the delicate balance we're building.
Combine Wet Ingredients and Simmer
Reduce heat to low and add the 0.5 cup red chili paste, 0.5 cup white vinegar, 0.5 cup granulated sugar, 0.25 cup low-sodium soy sauce, 0.25 cup water, and 0.5 teaspoon salt. Stir continuously for 3-4 minutes until the sugar fully dissolves and the mixture thickens slightly—you're looking for a consistency between pancake batter and heavy cream.
The sugar needs time to fully integrate to prevent graininess in the final sauce. Taste at this stage—you should detect the sweetness of the sugar, the tang of vinegar, and the initial heat from the chili paste. If the mixture looks too thin, simmer for another 1-2 minutes to reduce it slightly before proceeding.
Thicken to Glossy Perfection
In a separate small bowl, whisk together 1 tablespoon cornstarch with 2 tablespoons water until completely dissolved. Slowly pour this slurry into the saucepan while stirring constantly over medium heat. Continue cooking for 3-5 minutes until the sauce reaches a glossy, velvety consistency that coats the back of a spoon.
This is where the magic happens—the cornstarch creates that signature Applebee's gloss that makes the sauce cling perfectly to wings and fries. You'll know it's ready when it pulls away from the sides of the pan slightly and leaves a clean streak when you run your finger through it. If it thickens too quickly, add 1 teaspoon water at a time until you reach the ideal consistency.
Cool and Adjust Seasoning
Remove the sauce from heat and let it cool for 5 minutes—this allows flavors to meld and prevents the cornstarch from over-thickening. Taste and adjust seasoning: add more sugar for sweetness, soy sauce for umami, or vinegar for tang. The final balance should be sweet, spicy, and slightly tangy with no single flavor overpowering.
I always make a small batch first to test the balance before committing to the full recipe. The sauce should be vibrant red with a glossy sheen, not dull or watery. If it separates or looks oily, whisk vigorously to re-emulsify. For best results, use the sauce immediately or store it in an airtight container in the refrigerator for up to 2 weeks—the flavors actually improve with time.
Pro Tips For Making Applebee'S Sweet Asian Chili Sauce
- Bloom the Chili Paste: Simmer the red chili paste in water first—about 2 tablespoons per 2 tablespoons of paste—until it thickens and darkens (3-5 minutes). I learned this the hard way: skipping this step leaves the sauce grainy and underdeveloped, no matter how long you simmer it later. The paste’s oils release properly, and the flavor deepens.
- Peel and Slice Ginger Thin: Use a mandoline or sharp knife to slice the ginger paper-thin (1/16-inch or less)—no need to peel unless it’s fibrous. My grandmother swore by this, and it works: thin slices infuse faster and dissolve into the sauce without leaving chewy bits. Skip the grating; it turns to mush.
- Simmer Slow and Low: Reduce the heat to a bare simmer after the first 5 minutes—no boiling, no rushing. I used to crank the heat to cut time, but the sauce separated and lost its glossy finish. A gentle simmer (small bubbles, occasional stir) keeps the sugar from crystallizing and the vinegar from overpowering.
- Sweeten Gradually: Add the sugar in two batches—half upfront, the rest at the 10-minute mark—so it dissolves evenly. Sounds weird, but it works: dumping all at once can cause sugar shock, making the sauce clump or turn cloudy. Stir constantly for the first 30 seconds after adding each batch.
Essential equipment for this dish
Small Saucepan
This recipe calls for a small, heavy-bottomed saucepan—I recommend a 3-quart stainless steel pan like the All-Clad Stainless or Cuisinart MultiClad. The heavy base distributes heat evenly, preventing hot spots that can burn your sauce.
A 3-quart size gives you enough room to stir without spilling while allowing for proper reduction. If you're working with a larger pan, reduce the heat to low-medium to maintain control. 🔥
Fine-Mesh Strainer
A fine-mesh strainer is essential if you want that ultra-smooth, restaurant-quality texture. I use a 3-inch stainless steel strainer from OXO to remove any grit from the chili paste or garlic. Simply pour the cooked sauce through it into a clean bowl before adjusting seasoning.
This step ensures your sauce has that velvety finish that makes it irresistible. For a quick version, skip straining but whisk vigorously to break up any lumps.
Whisk for Smoothness
Invest in a balloon whisk—I swear by the Mauviel M-70—to achieve that glossy, lump-free consistency. The flexible wires cut through ingredients more effectively than flat whisks, especially when combining the cornstarch slurry. Use it constantly while simmering to prevent the sauce from sticking to the pan.
A heat-resistant silicone whisk works too if you're on a budget, but avoid metal whisks that can scratch your pan over time.
Measuring Spoons
Precision matters with this sauce, so grab a set of stainless steel measuring spoons—I prefer OXO Good Grips for their durability and accuracy. The 1/8-teaspoon and 1/4-teaspoon sizes are critical for adjusting seasoning at the end.
A digital kitchen scale is even better for measuring the cornstarch slurry by weight (about 15 grams for the cornstarch alone) to ensure perfect thickening. 💡
Glass Storage Jar
For storing your sauce, use a glass jar with an airtight lid, like a mason jar or Le Parfait container. Glass preserves flavor better than plastic and won’t absorb odors.
A 16-ounce jar is ideal for batch cooking—it fits neatly in the fridge and leaves room for the sauce to expand slightly if you double the recipe. Label it with the date to track freshness, as the sauce peaks after 3-5 days in storage.
Nutrition facts
Frequently asked questions
Can I make this sauce without chili paste?
You can substitute with a mix of 2 tablespoons Sriracha plus 1 teaspoon cayenne pepper, but the texture won't be identical. For best results, use 1/4 cup tomato paste mixed with 1/2 teaspoon smoked paprika and 1/2 teaspoon garlic powder to mimic the depth. The sauce will be slightly less glossy but still delicious!
Why does my sauce look too thin or too thick?
If it's too thin, simmer uncovered for 2-3 extra minutes to reduce. For thickening, whisk in 1/2 teaspoon cornstarch mixed with 1 teaspoon water at a time until perfect. Too thick? Thin with 1 teaspoon water or vinegar while stirring constantly. The ideal consistency coats the back of a spoon but still drizzles smoothly.
How can I use this sauce beyond wings and fries?
This versatile sauce elevates grilled meats, stir-fries, noodle bowls, and even marinated tofu! Drizzle over pho or ramen for instant umami, use as a glaze for baked chicken thighs, or mix into peanut sauce for a spicy twist. The sweet-spicy balance works surprisingly well with roasted vegetables too!
Can I make this sauce spicier or less spicy?
For extra heat, add 1/2 teaspoon red pepper flakes or 1 teaspoon gochujang. To reduce spice, increase the sugar to 0.625 cups or add 1 tablespoon honey. For milder heat, reduce chili paste to 0.375 cups but never below 0.25 cups—that's where the sauce loses its signature depth.
How do I fix a sauce that's too tangy or too sweet?
For excessive tang, balance with 1/2 teaspoon more sugar or 1 teaspoon honey. Too sweet? Add 1/2 teaspoon more vinegar or 1/4 teaspoon soy sauce for umami depth. Always adjust gradually—taste after each addition. The magic ratio is equal parts sweet, tangy, and spicy with umami tying it all together!